An additionally ordered IP address must be set up on your server so that it can be reached. This article is only valid for Dedicated and Virtual Dedicated Server. With a VPS the network configuration is automatically configured. Proceed as follows:
Debian and Ubuntu up to version 16.04
Add the following entry to the file /etc/network/interfaces:
auto eth0:1iface eth0:1 inet staticaddress <additional IP-Address>
netmask 255.255.255.255
<additional IP-Adresse> The corresponding IP address is inserted here. The network service is then restarted using the following command:
service networking restart
Ubuntu >= 18.04
In the file /etc/netplan/01-netcfg.yaml adapt the following line:
addresses: [ "<Haupt-IP-Adresse>/32", "<additional-IP-Adresse>/32"]
<additional-IP-Adresse> The corresponding IP address is inserted here. The network service is then restarted using the following command
netplan apply
If an error should have crept into the YAML file, it is immediately displayed and can then be directly edited again.
Note: When using Netplan, you must work with spaces. The use of "Tab" is not possible.
CentOS Linux
A permanent configuration is only possible by default via alias interfaces (eth0:1, eth0:2 etc.). For this purpose, a file must be created for each IP address.
Note: The network interface is called eth0 in the example. This may differ from your network interface. You can read out the currently used network interface with the following command:
ip r s | grep default
default via 192.168.178.1 dev eth0 proto static metric 100
eth0 -> the network interface used. The main IP of your server is also configured here.
create file
/etc/sysconfig/network-scripts/ifcfg-eth0:1
These files must each contain the following information:
DEVICE=eth0:1


BOOTPROTO=none


ONBOOT=yes
IPADDR=<additional IP-Adresse>


NETMASK=255.255.255.255
Windows
Setting up an additional IP address can be done via the graphical user interface or via the CMD.
graphic solution
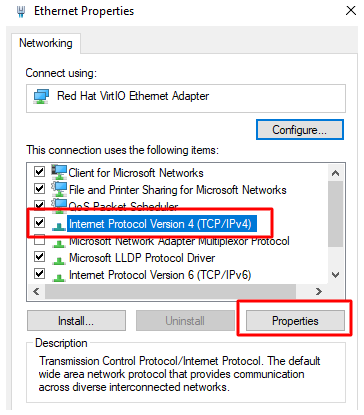
Switch to the properties of the network card:
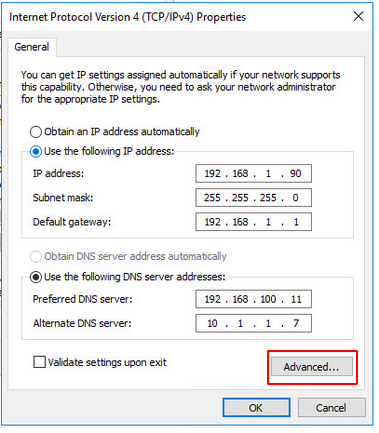
Open the advanced settings and add the additional IP-address.
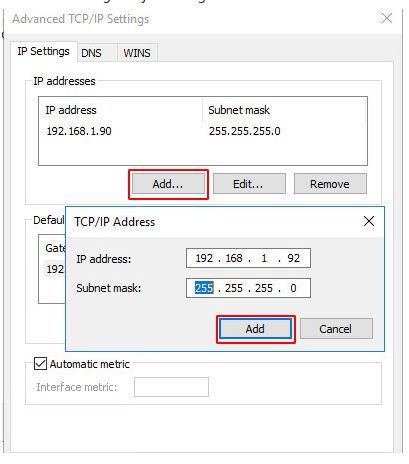
Important: The subnet mask of the additional IP is basically: 255.255.255.255
CMD
netsh interface ipv4 add address name="Ethernet" <zusätzliche IP-Adresse> 255.255.255.255
Carry out IP configuration in the ZKM
In order for the additional IP address to be used, the IP configuration in the ZKM must be adjusted and set to "host route". "Virtualisation" is used for virtualisation purposes.
To do this, log into the ZKM and navigate to the corresponding server contract. Now select "Configuration".
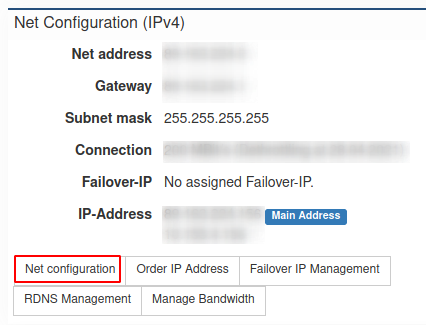
Now set the additional IP addresses to "Host-Route".